Generating and Signing Documents
Learn to generate documents from eWay-CRM and send them to your clients for electronic signature.
Applies to
Note
The article describes work with the Adobe Sign add-in but similar steps can be used for the DocuSign add-in.
In order to send any document for a signature, we first need to install the necessary add-on in Word.
- Open any Word document, click Insert and Get Add-ons.
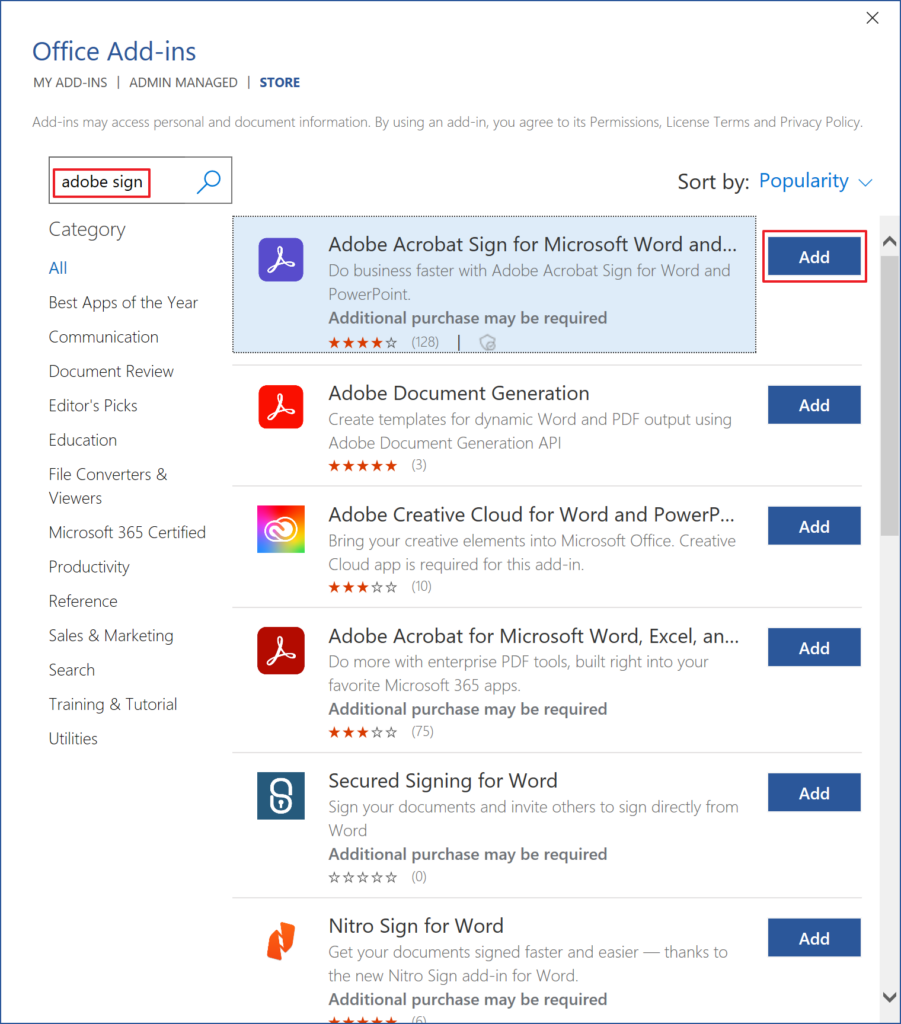
- Search for Adobe Acrobat Sign add-on and click Add.
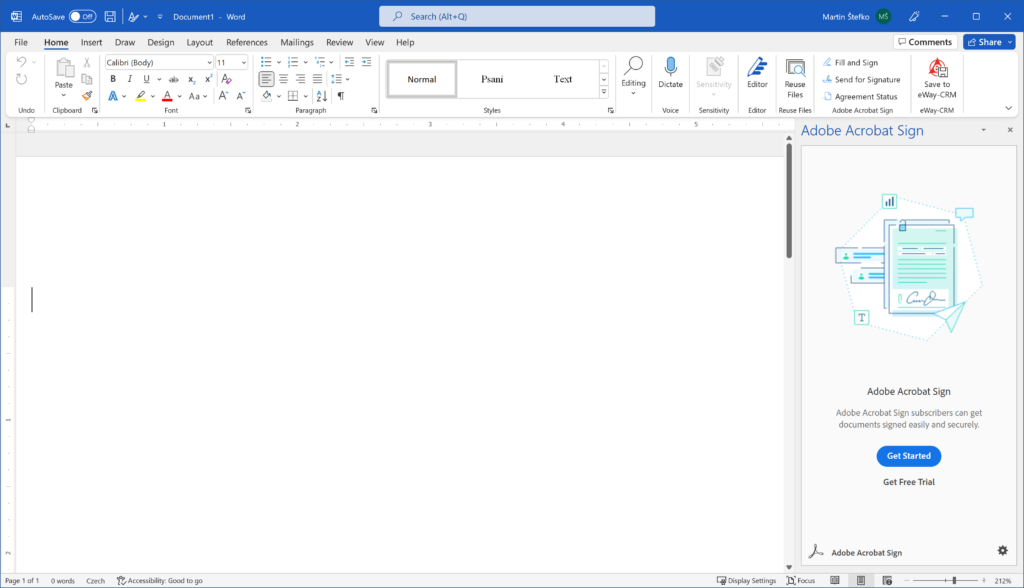
- The add-on will now appears active in your Word. After clicking on one of the options you will need to log in to Adobe / create an account.
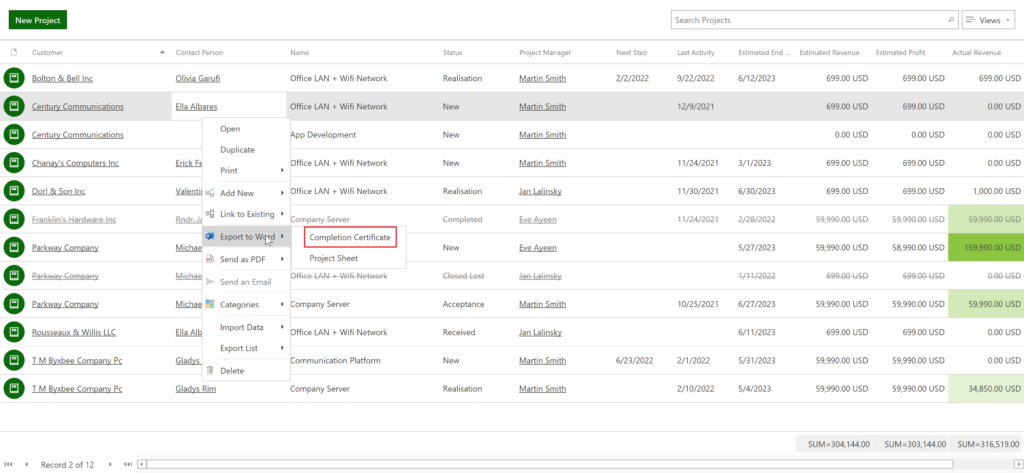
- You can now generate a prepared document template directly from eWay-CRM. Right-click on the file that you want to send for signature, from the menu select Export to Word and select for example Acceptance protocol.
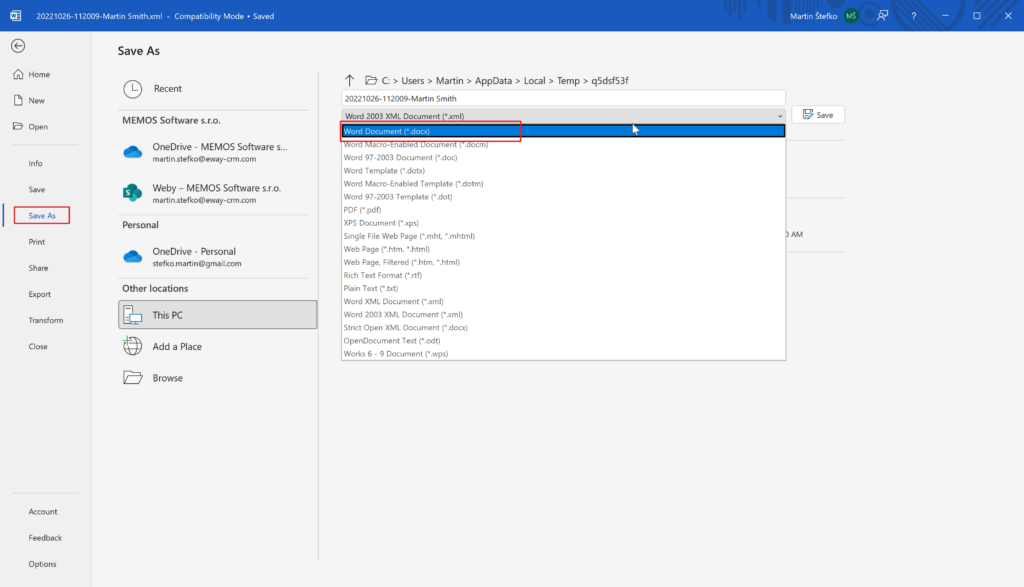
- After opening the document, select File, then Save As and select Word Document (*.docx). And finally Save.
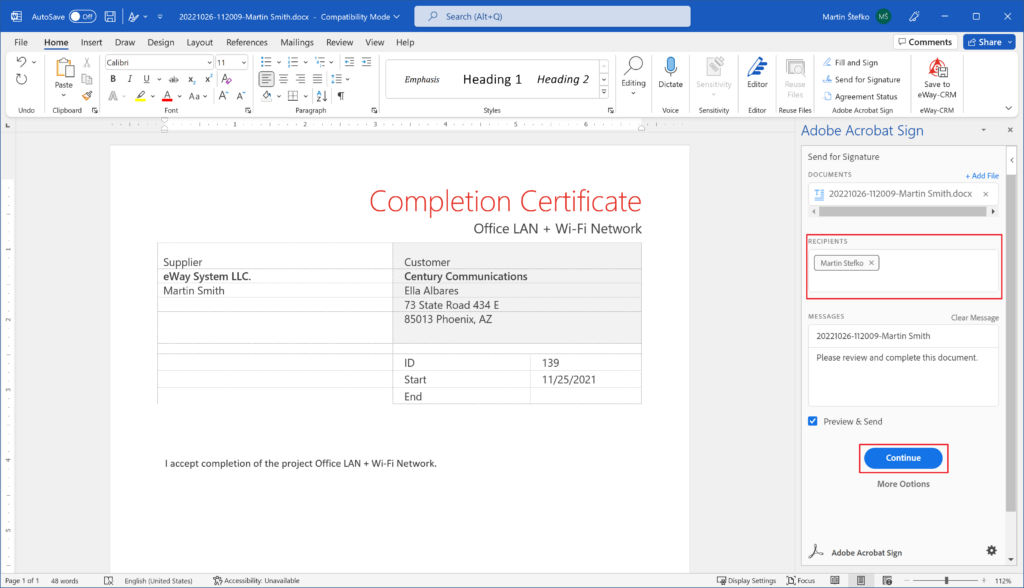
- In the right corner of the document, click on Send for signature and enter the recipient’s email address in the Recipients section. Then confirm with the Continue button.
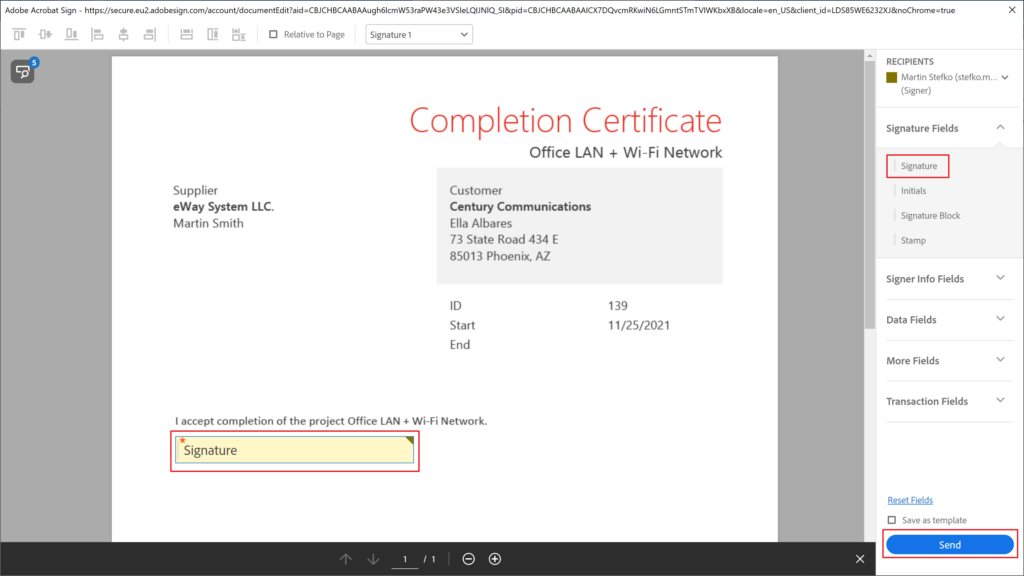
- In the new opened window, you will need to click on Signature and drag and drop this selection with your mouse. You will then confirm via the Send button.
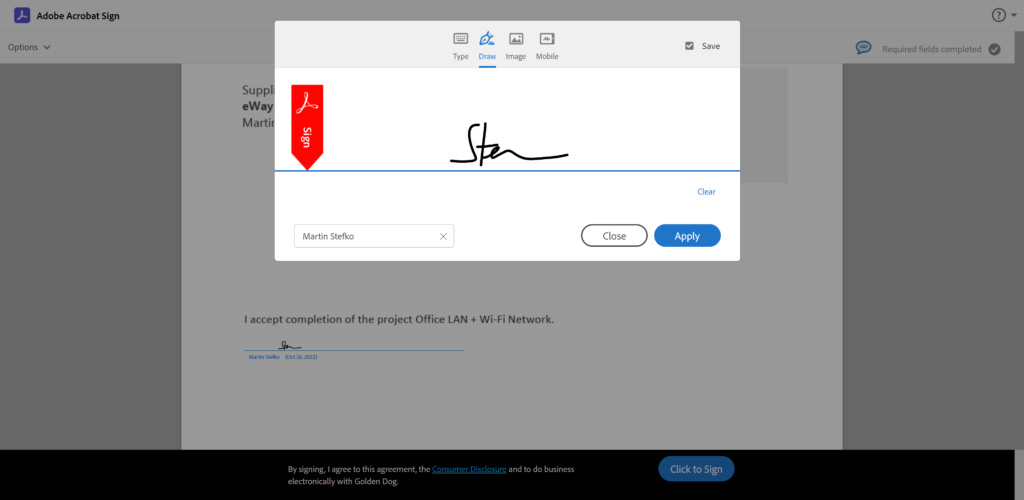
- The recipient, without having to be registered anywhere, receives a message with a document to be signed. Your client opens the document and selects the form of signature and confirms.
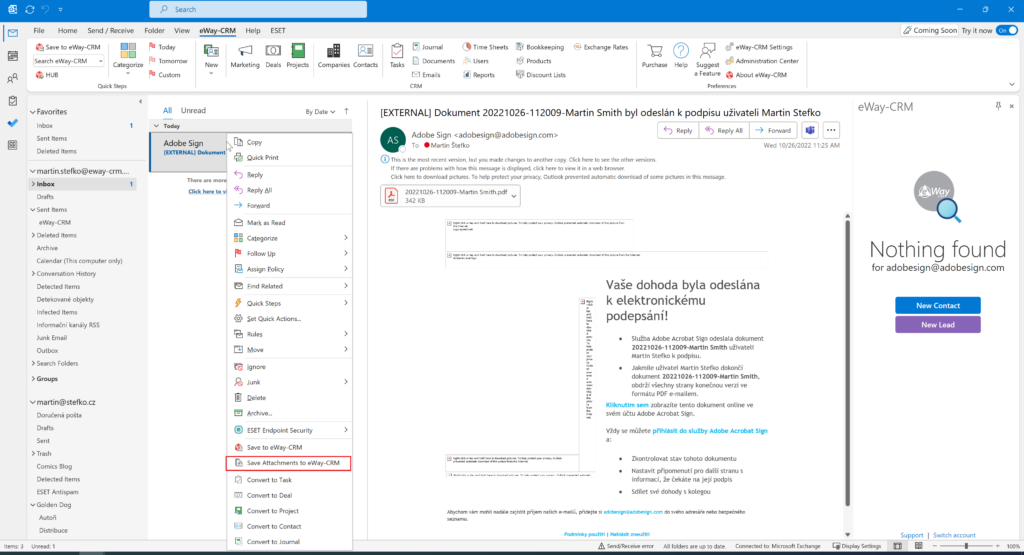
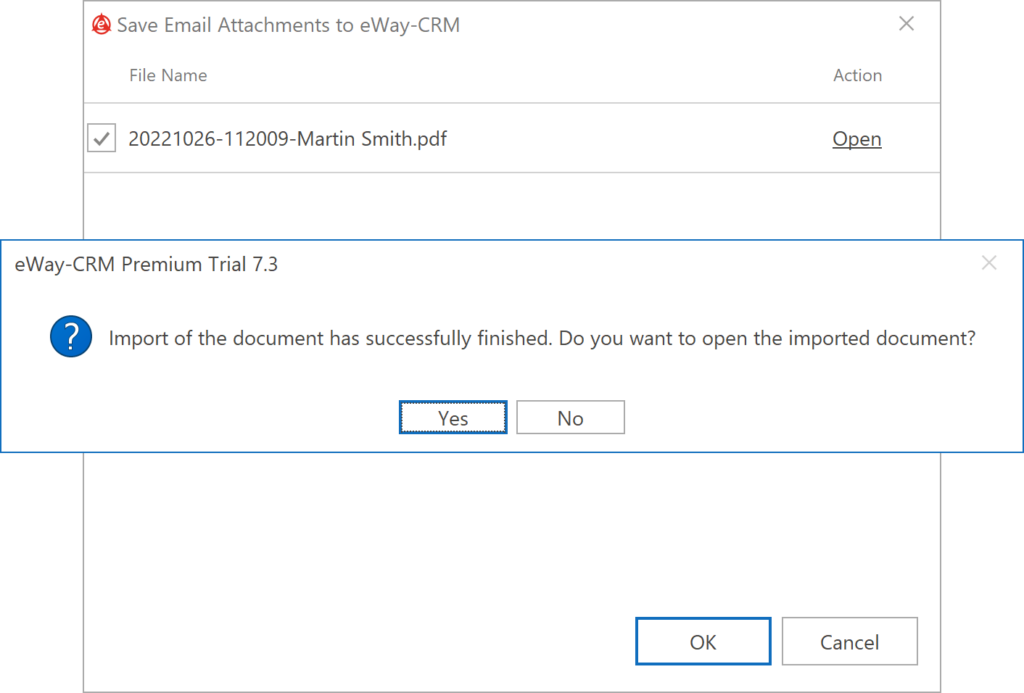
- An email will then be sent to your inbox with a document already signed. Just right click on the email and select Save attachments to eWay-CRM.
- Confirm with Yes button here.
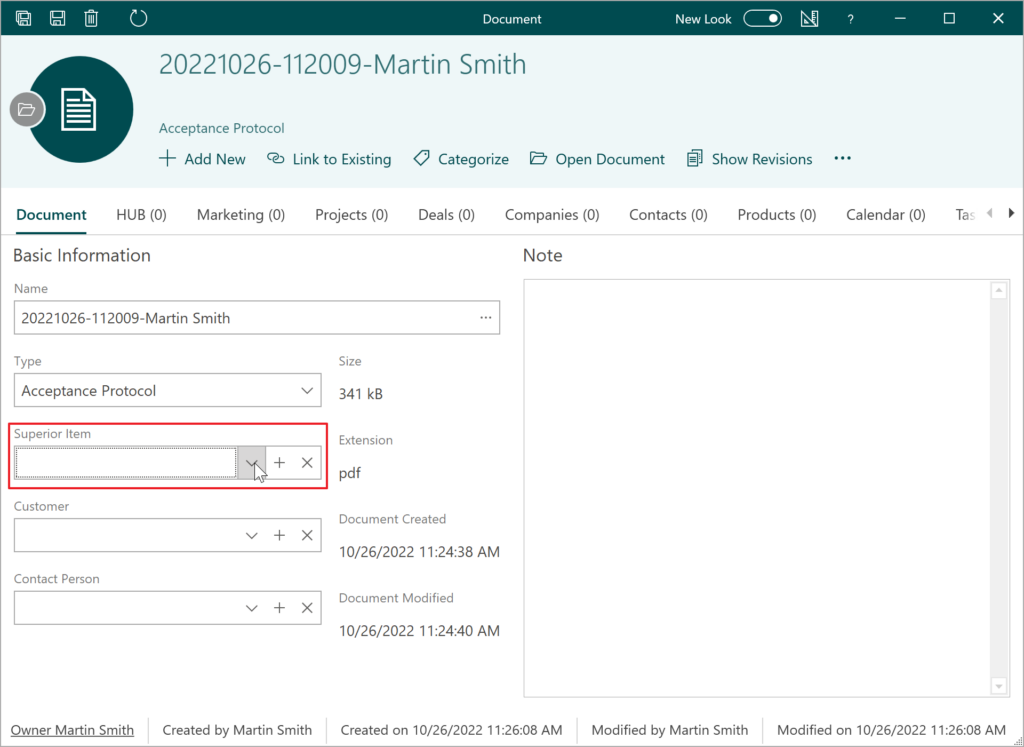
- You can open the card of the given document directly in eWay-CRM. As a final step, you need to select the appropriate Project. Click on Superior item and select the project.
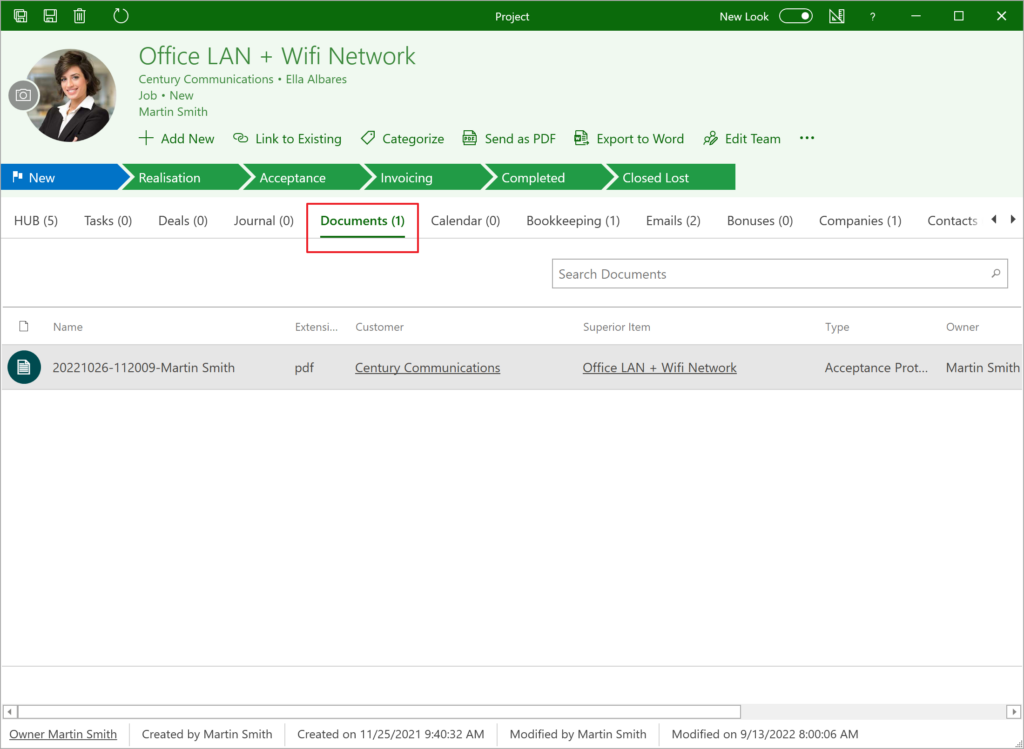
- In the Project card, you will see this attached and signed document from the client in the “Documents” tab.

Tip on easy sending of documents
In the list of documents, just right-click a document or documents you want to send and select Send by Email. Document(s) will be attached to the email and you just insert receiver and text. It’s easy.

